DIY Candles

This is truly one of the EASIEST DIY’s and it makes a great gift for family or friends. DIY Candles are much healthier than inhaling many of the toxins found in store bought. This DIY candle takes only ten minutes and the final product is beautiful!
You’ll need:
EcoSoy Wax (enough to fill your vessel)
20-30 shakes of your favourite essential oil(s)
Wick
Vessel to put the wax in (We love mason jars for this! They’re inexpensive and make a beautiful centrepiece on a table to show off your work.)
A clean 1L mason jar
Scotch tape (I’ll share the secret for this in the instructions!)
A large saucepan filled halfway with water
As we’re coming up on the holidays as well as Cold/Flu season, we decided to make two different DIY candles. The first is a Eucalyptus candle! Eucalyptus oil is a great essential oil that helps to clear up the nasal passages as well as cleanse the body of toxins. The second candle was made with both Peppermint Essential oil and Fir Pine essential oil to create the perfect holiday smell! Peppermint Oil has multiple health benefits which include soothing digestive issues as well as boosting energy. Fir Pine oil helps improve respiratory function and increase metabolism.
Now for the fun part!
STEP 1:
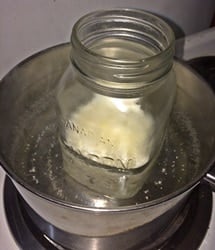
Measure out of the amount of wax needed to fill your candle vessel. If you know the volume of the vessel, simply use a measuring cup to scoop out your wax. If you’re unsure of the volume, an easy way to measure is to fill the vessel with the wax. Remember to pack it in tight and overfill it as the wax will melt and you’ll need enough to fill to the rim. Once the wax is measured, place it in the 1L Mason jar. Place the Mason jar in the centre of the saucepan. This is a clean, mess-free way of melting wax! After about 5-8 minutes, the wax should be completely melted!
STEP 2:
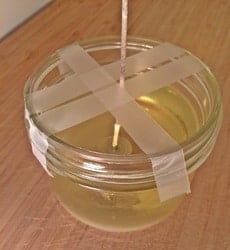
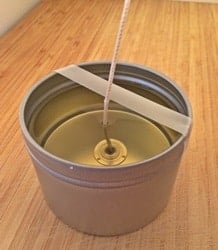
While your wax is melting on the stovetop, it’s time to prepare the vessel for the candle. Place your wick base in the centre of the vessel. You’ll notice that the wick is most likely bending and won’t stay in the centre. This is where that handy Scotch tape comes into play! As seen in the photo above, by placing tape across the top of the vessel, you can hold the wick in place while the wax is drying!
STEP 3:
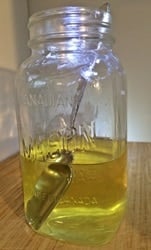
The candle holder is prepared and your wax is now melted. Time to mix in your essential oils! Place a tea towel on the counter or table that you’ll be working on so the Mason jar doesn’t drip or heat the surface. Use a large spoon to stir the wax as you put the essential oils in. Although we have a suggested amount in the ingredient listed, adjust it to your personal preference. If you prefer a very mild smelling candle, start with ten shakes and work your way up. If you don’t think it’s strong enough, shake some more in until it’s just right!
STEP 4:
Now that your wax is smelling wonderful, pour it into your candle holder. Make sure you’re working on a flat surface so the wax dries evenly. If your pour space is too small because of the tape, you can remove the tape and put back on once the wax is in. Now, sit and relax while your masterpiece hardens!
STEP 5:
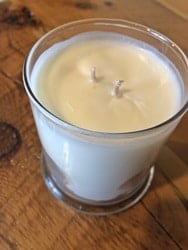
The candle should take between 10-20 min to harden pending on the thickness of the candle holder and the temperature in the room. Once finished, simply cut the wick and enjoy!
DIY Candles are a great gift to someone special, simply wrap with ribbon or twine and you have yourself an inexpensive, home-made, and beautiful gift!
By M. Graham
FeelGood Blogger